
 by
by If you’ve been running a bunch of self-hosted services at home, you’ve probably wrestled with one annoying problem: your browser keeps screaming at you about insecure connections. You could bypass the warning every time, or you could set up proper HTTPS — the kind your browser actually trusts — entirely within your LAN. No port-forwarding. No exposing anything to the internet.
This is exactly what I set up, and in this post I’ll walk you through the whole thing: a single wildcard SSL certificate issued via Let’s Encrypt DNS challenge, routed through NGINX Proxy Manager (NPM), with local DNS resolution handled by Pi-hole.
What You’ll End Up With
Before diving into the steps, here’s what this setup delivers:
- A valid, browser-trusted HTTPS cert for all your LAN apps — no more certificate warnings
- One wildcard cert covering
*.local.yourdomain.com— reused for every service - No need to open inbound ports to the internet
- Local DNS routing via Pi-hole, so
siyuan.local.yourdomain.comresolves to your reverse proxy - Optional Pi-hole primary → secondary replication for redundancy
The overall architecture looks like this:
LAN Client
  → Pi-hole DNS
      → *.local.yourdomain.com = [NPM IP]
  → NGINX Proxy Manager
      → per-app upstreams (by hostname)

Certificate Flow:
NPM → Let's Encrypt → Cloudflare DNS Challenge
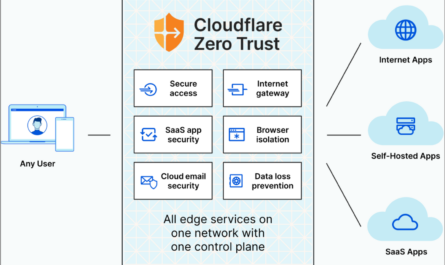
Clean, simple, and entirely self-contained inside your home network. If you’re already familiar with how Cloudflare Zero Trust tunnels work for external access, think of this as the LAN-only equivalent — trusted certificates, no public exposure.
Prerequisites
Make sure you have these in place before starting:
- A domain you own, with DNS managed by Cloudflare (free tier works fine)
- A Cloudflare API token with
Zone:DNS:Editpermission - NGINX Proxy Manager running — I run mine in Docker (see my guide on installing Docker on Ubuntu)
- Pi-hole running — one instance is enough, a secondary is optional
For the examples in this post I’ll use:
- Domain:
yourdomain.com - LAN namespace:
*.local.yourdomain.com - NPM IP:
192.168.0.10 - Pi-hole (primary):
192.168.0.20 - Pi-hole (secondary):
192.168.0.21
Swap these out for your own values throughout.
Step 1: Issue One Wildcard Certificate in NPM
This is the key move — instead of creating a cert per service, you issue one wildcard cert that covers everything under *.local.yourdomain.com.
In NPM, go to SSL Certificates → Add SSL Certificate → Let’s Encrypt. Fill in:
- Domain Names:
local.yourdomain.comand*.local.yourdomain.com - Email: your email
- DNS Challenge: enabled
- DNS Provider: Cloudflare
- Credentials: paste your API token
If you’re automating via the NPM API, the payload looks like this:
{
  "provider": "letsencrypt",
  "nice_name": "wildcard.local.yourdomain.com",
  "domain_names": ["local.yourdomain.com", "*.local.yourdomain.com"],
  "meta": {
    "letsencrypt_agree": true,
    "dns_challenge": true,
    "dns_provider": "cloudflare",
    "dns_provider_credentials": "dns_cloudflare_api_token=YOUR_TOKEN_HERE",
    "letsencrypt_email": "[email protected]"
  }
}
Once issued, this single cert gets attached to every proxy host you create — no per-app cert issuance ever again.
💡 Note: Let’s Encrypt wildcard certs require DNS challenge. HTTP challenge won’t work for
*.domains. Cloudflare makes this painless.
Step 2: Configure Pi-hole Wildcard DNS
Now you need your Pi-hole to resolve anything.local.yourdomain.com to your NPM IP — without having to add a DNS record for every single service.
SSH into your primary Pi-hole and drop in a single dnsmasq rule:
sudo tee /etc/dnsmasq.d/99-wildcard-local.conf > /dev/null <<'EOF'
address=/.local.yourdomain.com/192.168.0.10
EOF

sudo pihole reloaddns
That one line handles every subdomain under local.yourdomain.com. Verify it’s working:
nslookup -type=A anyapp.local.yourdomain.com 192.168.0.20
nslookup -type=AAAA anyapp.local.yourdomain.com 192.168.0.20
You want:
A→192.168.0.10✅AAAA→ no answer ✅ (more on why in the pitfalls section)
Step 3: Add Per-App Proxy Hosts in NPM
With the wildcard cert ready and Pi-hole routing DNS to NPM, you now add one Proxy Host per service in NPM. For example:
| Hostname | Backend |
|---|---|
siyuan.local.yourdomain.com | http://192.168.0.87:6806 |
nas.local.yourdomain.com | https://192.168.0.50:5001 |
home.local.yourdomain.com | http://192.168.0.60:8783 |
I personally run SiyuanNote as a self-hosted Notion alternative — and this exact setup is how I give it a clean, trusted HTTPS URL on my LAN. You can also export pages from your self-hosted SiyuanNote to PDF once it’s running nicely behind the proxy.
For each host, set:
- SSL Certificate: the wildcard cert from Step 1
- Force SSL: enabled
- HTTP/2 Support: enabled
- WebSockets: enable if the app needs it (e.g. SiyuanNote, Home Assistant)
⚠️ Important: The upstream must point to the real backend IP:port — never to NPM itself (e.g. localhost:80). That’s a common mistake I’ll cover in the pitfalls section.
Step 4: Cloudflare DNS — What to Do (and Not Do)
Since all your clients resolve DNS via Pi-hole, you don’t need Cloudflare records for *.local.yourdomain.com at all. But if you choose to keep them:
- Set them as DNS-only (grey cloud, not proxied)
- Don’t add public
AAAArecords for LAN-only hostnames — this causes QUIC/protocol issues
For strict LAN-only behavior, I recommend keeping *.local.yourdomain.com out of Cloudflare’s public DNS entirely. Let Pi-hole own the resolution. For anything you do want publicly accessible, check out my earlier post on hosting personal apps securely with Cloudflare Zero Trust — it pairs well with this setup.
Step 5: Sync to Secondary Pi-hole (Optional)
If you run a secondary Pi-hole for redundancy, trigger a sync after making DNS changes. I use a containerized sync tool (running in Docker — here’s how to get Docker set up on Ubuntu if you haven’t already):
docker restart nebula-sync
docker logs --tail 50 nebula-sync
Wait for Sync completed, then verify the secondary resolves correctly:
nslookup -type=A anyapp.local.yourdomain.com 192.168.0.21
Step 6: Validation Checklist
Before calling it done, run through this checklist:
- ✅ Wildcard cert exists in NPM for
*.local.yourdomain.com - ✅ Pi-hole wildcard
Arecord resolves to NPM IP - ✅ No
AAAAanswer for LAN-only hostnames - ✅ NPM proxy host exists for each app
- ✅ HTTPS opens with a trusted green padlock
Quick test commands:
nslookup -type=A siyuan.local.yourdomain.com 192.168.0.20
curl -I https://siyuan.local.yourdomain.com
A 401, 403, or 404 response from curl is still a win — it means the cert is valid and the backend is responding. That’s all you need to confirm.
Pro Tip: Manage Services via a CSV
Once you have more than 5–6 services, managing them one-by-one in the NPM UI gets tedious. I use a simple CSV as a source of truth and automate the NPM proxy host creation:
name,subdomain,backend_host,backend_port,scheme,websocket,enabled
siyuan,siyuan.local.yourdomain.com,192.168.0.87,6806,http,TRUE,TRUE
nas,nas.local.yourdomain.com,192.168.0.50,5001,https,TRUE,TRUE
home,home.local.yourdomain.com,192.168.0.60,8783,http,TRUE,TRUE
Adding a new service is a one-line CSV edit + script run. No clicking through the UI, no risk of misconfiguring SSL. This kind of self-hosted, private setup is exactly where automation pays off. I’ll cover the full automation script in a follow-up post.
Common Pitfalls
These are the mistakes I either made myself or have seen trip people up:
- Pointing NPM upstream to itself — the upstream must be the real backend IP, not NPM’s own address on port 80
- Cloudflare orange cloud on LAN-only hostnames — proxied records will break local resolution
- AAAA records for local-only hosts — IPv6 answers for a LAN-only hostname cause QUIC protocol mismatches and confusing browser errors
- Cert issued outside NPM — if you issued the cert elsewhere, you need to import it into NPM’s cert store, not just reference the file path
Why This Setup Works So Well
The beauty of this approach is that it brings enterprise-style ingress behaviour into a homelab without the complexity. One cert, one reverse proxy, one DNS rule — and every new service you add just needs a single CSV row and a proxy host entry. Trusted TLS everywhere on your LAN, zero port-forwarding, and no per-app certificate management overhead.
If you’re already running Pi-hole and NPM (and if you’re into self-hosting, you probably are), this is one of the highest-value upgrades you can make to your homelab setup. Combine it with Cloudflare Zero Trust for external access and you’ve got a solid, layered approach to both LAN and internet-facing services.
Have questions or a different approach? Drop a comment below — always curious how others manage their homelab ingress.